How to Automate Your Ecommerce Order Flow with n8n — What You’ll Accomplish
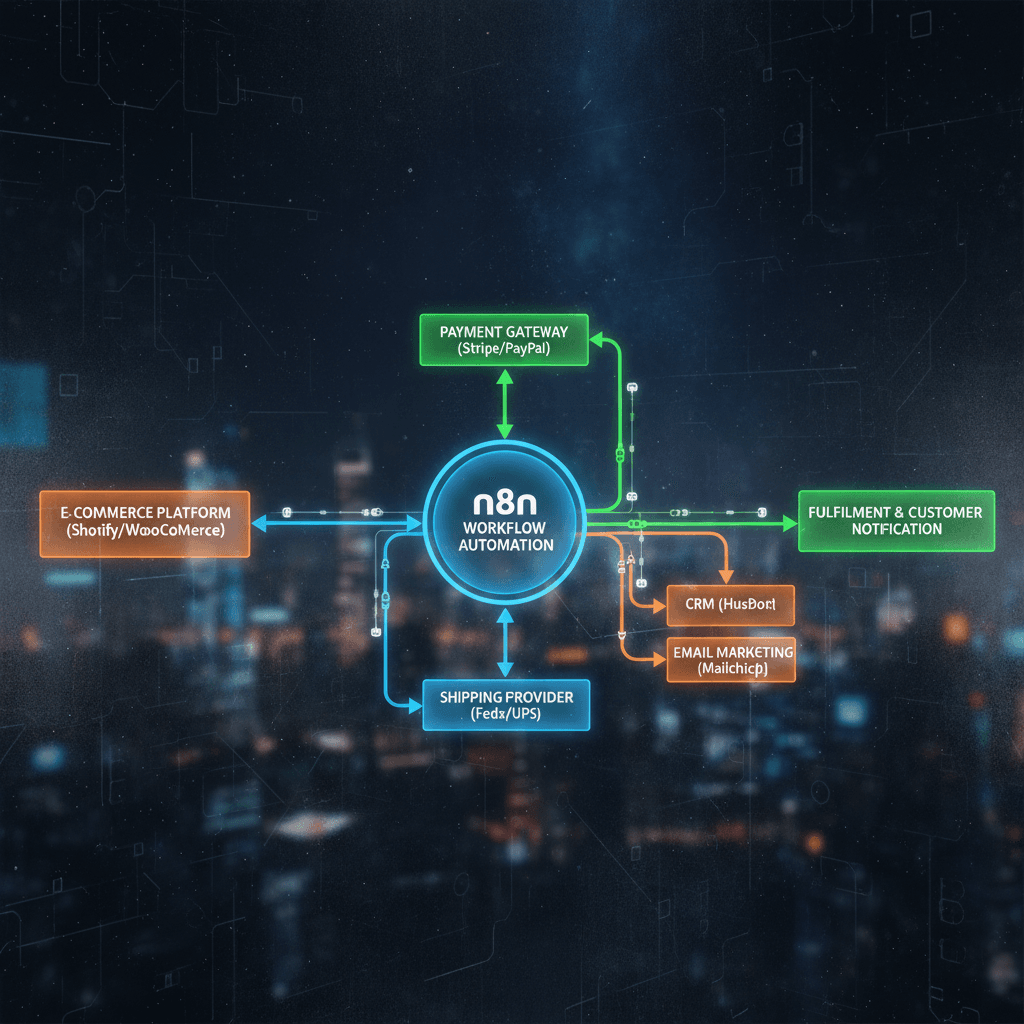
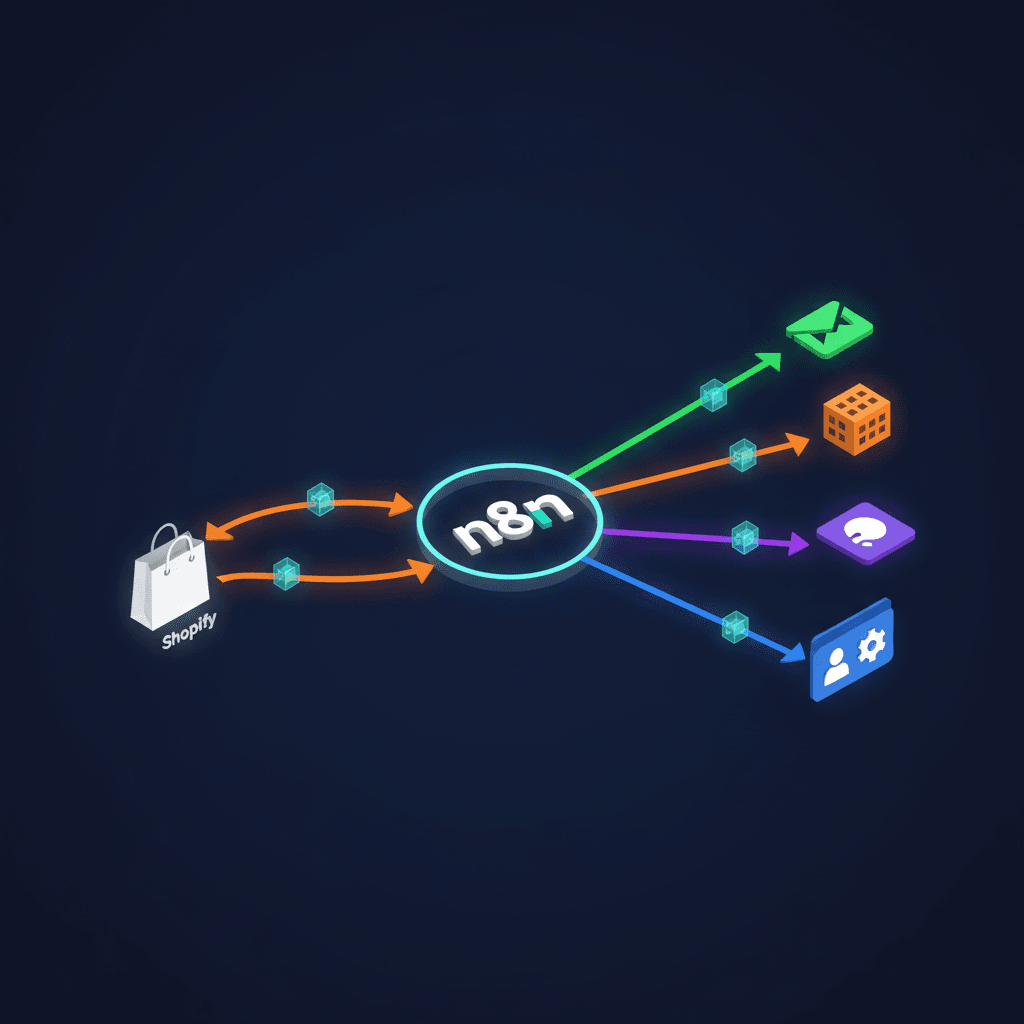
If you’ve been searching for a practical guide on how to automate your ecommerce order flow, you’re in exactly the right place. In the next 30–45 minutes, you’ll build a fully functional n8n workflow that captures new orders from your store (Shopify or WooCommerce), sends instant confirmation emails, logs order data to Google Sheets, notifies your team on Slack, and triggers a post-purchase follow-up sequence — all without writing a single line of code. By the end, you’ll have a living, breathing automation engine running 24/7 in the background while you focus on growing your business.
This tutorial is designed for store owners and ops managers who are tired of manually copying order details into spreadsheets, forgetting to follow up with customers, or missing Slack alerts when something goes wrong. Whether you’re processing 10 orders a day or 1,000, knowing how to automate your ecommerce workflows with n8n is one of the highest-leverage skills you can develop right now.
Prerequisites Checklist
Before you dive in, make sure you have the following ready. Skipping any of these will cause friction later, so take five minutes to check each one off now.
- An active n8n account — either self-hosted or n8n Cloud (free tier works fine to start)
- A Shopify or WooCommerce store with at least one test order you can place
- A Gmail account (or SMTP credentials) for sending confirmation emails
- A Google account with access to Google Sheets
- A Slack workspace where you have permission to create a bot or incoming webhook
- Basic familiarity with navigating a browser-based tool — no coding required
- 30–45 minutes of uninterrupted focus time
Tools You’ll Need
- n8n — The core automation platform. Visit n8nlab.io for ecommerce-specific workflow inspiration and templates.
- Shopify or WooCommerce — Your order source. Both are supported natively by n8n nodes.
- Google Sheets — Your order log and reporting hub.
- Gmail / SMTP — For sending transactional emails.
- Slack — For real-time team notifications.
- Stripe or PayPal (optional) — For payment sync if needed.
If you want expert help setting up more complex pipelines, our n8n Workflow Automation Services team at Orchient can design and deploy custom workflows tailored to your store.
Step 1: Set Up Your Webhook Trigger Node
The first thing you need when learning how to automate your ecommerce order flow is a reliable trigger — the starting gun that fires your entire workflow the moment a new order lands. In n8n, the best way to achieve this is with a Webhook node, which listens for HTTP POST requests sent by your store platform.
Open your n8n canvas and click the “+” button to add a new node. Search for “Webhook” and select it. You’ll see two URL options: a Test URL and a Production URL. For now, copy the Test URL — you’ll use this to fire a sample payload from your store.
Head over to your Shopify admin panel. Navigate to Settings → Notifications → Webhooks and click “Create webhook.” Set the event to “Order creation” and paste your n8n Test URL into the URL field. Save it. In WooCommerce, the path is WooCommerce → Settings → Advanced → Webhooks → Add webhook, and the topic should be “Order created.”
Back in n8n, click “Listen for test event” on your Webhook node. Then place a test order in your store — even a $0 test product works perfectly. Within seconds, you’ll see the raw JSON payload appear in n8n, containing fields like order_id, customer_email, total_price, line_items, and shipping_address. This is the data that will flow through every subsequent node in your workflow. Take a moment to explore the payload structure — understanding your data shape here will save you time in every step that follows. You’ve just completed the most important foundational step in learning how to automate your ecommerce operations with n8n.
Step 2: Add a Set Node to Map and Clean Your Order Data
Raw webhook payloads from Shopify or WooCommerce can be deeply nested and inconsistently named. Before passing data downstream, you’ll want to use an n8n Set node to extract only the fields you care about and give them clean, consistent names. This is a best practice when you want to know how to automate your ecommerce data pipeline reliably across multiple integrations.
Add a Set node after your Webhook trigger. In the Set node’s configuration panel, click “Add Value” and create the following mappings using n8n’s expression editor (click the lightning bolt icon to toggle expression mode):
- order_id →
{{ $json["id"] }} - customer_name →
{{ $json["billing_address"]["first_name"] }} {{ $json["billing_address"]["last_name"] }} - customer_email →
{{ $json["email"] }} - order_total →
{{ $json["total_price"] }} - order_date →
{{ $json["created_at"] }} - items_count →
{{ $json["line_items"].length }}
Toggle the “Keep Only Set” option to ON so that only your mapped fields pass forward — this keeps your workflow clean and prevents accidental data leakage. Click Execute Node and confirm your mapped values look correct in the output panel. You should see a tidy object with six clean fields. This clean data object is now what every downstream node will use, making your entire workflow more maintainable and easier to debug. If you’re running stores on both Shopify and WooCommerce, this is also where you’d normalize field names — for example, mapping Shopify’s order_id and WooCommerce’s order_number to a single unified order_id field.
Step 3: Log Every Order to Google Sheets Automatically
One of the most immediately valuable ways to understand how to automate your ecommerce reporting is to build a live order log in Google Sheets that updates itself the moment each order comes in. No more manual exports, no more end-of-day copy-paste sessions. Add a Google Sheets node after your Set node.
In the Google Sheets node, authenticate with your Google account using OAuth2 — n8n will guide you through this in a pop-up window. Once connected, set the Operation to “Append Row” and select your target spreadsheet and sheet tab. In the “Values to Send” section, map each column to the corresponding field from your Set node: Order ID, Customer Name, Email, Total, Date, and Items Count.
Create a matching header row in your Google Sheet first — this makes the appended data readable immediately. Now every time a new order triggers your webhook, a new row will appear in your spreadsheet within seconds. You can share this sheet with your fulfillment team, your accountant, or your business partner, giving everyone real-time visibility without anyone needing to log into Shopify. This single automation step alone typically saves ecommerce teams 2–5 hours per week in manual data entry. As your store scales, this log becomes the foundation for sales dashboards, inventory planning, and customer analytics — all powered by the same n8n workflow you’re building right now.
Step 4: Send an Automated Order Confirmation Email
Your customers expect a confirmation email the moment they place an order. Understanding how to automate your ecommerce email touchpoints is critical for customer trust and satisfaction. Add a Gmail node (or Send Email node if using SMTP) after your Google Sheets node.
Authenticate with your Gmail account. Set the Operation to “Send Email.” In the To field, use the expression {{ $json["customer_email"] }} to dynamically address each email to the right customer. Craft a warm subject line like “Thanks for your order, {{ $json[“customer_name”] }}! 🎉” and write a message body that includes the order ID, total, and an estimated delivery timeframe.
Use n8n’s HTML email body option to make your confirmation look polished. You can include your logo URL, a styled order summary table, and a link back to your store. If you want to go further with personalized post-purchase sequences, our AI Chatbot Solutions can complement this workflow by handling customer follow-up questions automatically. Test this node by executing it with your sample order data — check your inbox to confirm the email arrives correctly formatted. A well-timed, personalized confirmation email dramatically reduces customer anxiety and support tickets, making this one of the highest-ROI steps in your entire automation stack.
Step 5: Notify Your Team on Slack in Real Time
Your fulfillment team shouldn’t have to refresh Shopify every few minutes to know when orders come in. This is another core reason why knowing how to automate your ecommerce operations pays off so quickly. Add a Slack node after your Gmail node to fire an instant notification to your #orders channel every time a new order is received.
In the Slack node, authenticate using an incoming webhook URL or OAuth bot token — both work well. Set the Resource to “Message” and the Operation to “Post.” Select your target channel (e.g., #orders or #fulfillment) and write a message template like:
🛒 New Order Received!
Order #{{ $json[“order_id”] }} from {{ $json[“customer_name”] }}
Total: ${{ $json[“order_total”] }} | Items: {{ $json[“items_count”] }}
📅 {{ $json[“order_date”] }}
This message will appear in Slack within seconds of each new order, giving your team the information they need to start fulfillment immediately. You can add conditional logic with an IF node before this step — for example, only sending a Slack alert for orders over $200, or flagging international orders with a 🌍 emoji for special handling. Real-time Slack notifications eliminate the need for manual monitoring, reduce fulfillment delays, and keep your whole team aligned without anyone needing to babysit a dashboard. For a deeper dive into building end-to-end business automations, explore our Business Process Automation services.
Step 6: Add Error Handling and Activate Your Workflow
Before you go live, you need to build in error handling — this is what separates a hobby automation from a production-grade system. Even seasoned builders who know how to automate your ecommerce workflows forget this step and end up with silent failures that lose orders. In n8n, you have two primary tools: the IF node for conditional logic and the Error Trigger node for catching failures.
Add an IF node after your Webhook and before your Set node. Configure it to check whether {{ $json["email"] }} is not empty — this prevents the workflow from proceeding with incomplete order data. On the false branch, connect a Slack or email node that alerts you when a malformed payload arrives.
Next, click the three-dot menu on your workflow canvas and select “Settings.” Enable the “Error Workflow” option and point it to a separate simple workflow that sends you an email or Slack message whenever any node in your main workflow throws an error. This safety net is invaluable during peak sales periods.
Finally, switch your Webhook node from Test URL to Production URL, update the webhook URL in your Shopify or WooCommerce settings, and toggle your workflow to Active using the switch in the top-right corner of the n8n canvas. Your workflow is now live. Place one final test order to confirm the end-to-end flow works in production mode — watch the Google Sheet update, check your email inbox, and verify the Slack message arrives. Congratulations: you’ve just gone fully live with a production automation.
How to Automate Your Ecommerce Workflow — Testing and Validation
Testing isn’t optional — it’s the step that gives you confidence to trust your automation with real customer data. Here’s a structured validation checklist to run through before you consider this workflow complete.
- Place a real test order using a $0 test product or a discount code that brings the total to $0.01. Use a real email address you control.
- Check your n8n execution log — navigate to Executions in the left sidebar and confirm all nodes show green checkmarks. Any red node indicates an error you need to investigate.
- Verify Google Sheets — confirm a new row appeared with all six fields populated correctly and no blank cells.
- Check your inbox — the confirmation email should arrive within 30 seconds, addressed to your test email with the correct order details.
- Check Slack — your #orders channel should show the notification with the correct order number and total.
- Test the error path — manually send a malformed webhook payload (missing the email field) and confirm your IF node routes it correctly to the alert branch.
Troubleshooting Common Issues
| Problem | Likely Cause | Fix |
|---|---|---|
| Webhook not receiving data | Test URL used in production, or wrong URL pasted in Shopify/WooCommerce | Switch to Production URL in n8n, update webhook URL in your store settings |
| Google Sheets node fails with 403 error | OAuth token expired or insufficient permissions | Re-authenticate your Google account in n8n credentials and ensure the sheet is owned by the authenticated account |
| Gmail sends but email goes to spam | Missing SPF/DKIM records or generic subject line | Use a custom domain email via SMTP, add SPF records, personalize subject lines |
| Slack message not posting | Bot not invited to the channel, or webhook URL expired | Type /invite @your-bot in the Slack channel, or regenerate the incoming webhook URL |
| Set node shows empty fields | Shopify/WooCommerce field path differs from expression used | Re-run webhook with a live order and inspect the raw JSON to find the correct nested path |
| Workflow executes but no data in Sheets | “Append” mode set incorrectly, or wrong sheet tab selected | Double-check the spreadsheet ID and sheet name match exactly, including capitalization |
ROI and Time Savings — What This Workflow Is Actually Worth
Let’s put real numbers on why learning how to automate your ecommerce order flow is worth your time today. Consider a store processing 50 orders per day. Without automation, a typical ops workflow looks like this:
- Manually copying orders to a spreadsheet: 45 minutes/day
- Sending or checking confirmation emails: 20 minutes/day
- Pasting order summaries into Slack: 15 minutes/day
- Total: ~80 minutes of manual work per day
With the n8n workflow you just built, all of that happens automatically in under 2 seconds per order. That’s ~490 hours saved per year — roughly 12 full work weeks returned to your team. At even a modest $25/hour value, that’s over $12,000 in recovered productivity annually. And that’s before accounting for the revenue upside: faster confirmation emails reduce customer anxiety, real-time Slack alerts speed up fulfillment, and a clean order log enables smarter inventory decisions.
As noted by n8nlab.io: “Transform your online store operations with automated n8n workflows for inventory management, order processing, and customer communication.” The setup time — under 45 minutes — pays for itself within the first day of operation.
Next Steps — Going Further with How to Automate Your Ecommerce Stack
You’ve built a solid foundation, but this is just the beginning of what’s possible when you commit to understanding how to automate your ecommerce operations end to end. Here are four natural next steps to expand your workflow:
- Abandoned Cart Recovery: Add a scheduled trigger (Cron node) that checks for carts abandoned in the last hour and fires a recovery email sequence automatically.
- Inventory Sync: Connect your Google Sheets order log to your inventory management system so stock levels update in real time after each order.
- CRM Customer Creation: Add a HubSpot or Airtable node that creates or updates a customer profile every time a new buyer places their first order.
- Post-Purchase Follow-Up: Schedule a follow-up email 7 days after delivery asking for a review — a proven tactic for boosting social proof with zero manual effort.
As the n8n community wisely advises: “Start small with one task (like order notifications) before tackling bigger workflows. It’s like learning to ride a bike — master the basics first.” You’ve done exactly that today. Now you have the confidence and the mental model to keep expanding.
The bottom line is this: knowing how to automate your ecommerce workflows isn’t a nice-to-have anymore — it’s a competitive necessity. Stores that run on automation move faster, make fewer errors, and deliver better customer experiences than those still relying on manual processes. With n8n’s 400+ integrations and the workflow you’ve built today, you’re already ahead of the curve. Keep building, keep testing, and remember — every hour you save with automation is an hour you can reinvest into growing your store.
Your Team Is Drowning In Repetitive Tasks
We automate them with AI so you can focus on growth